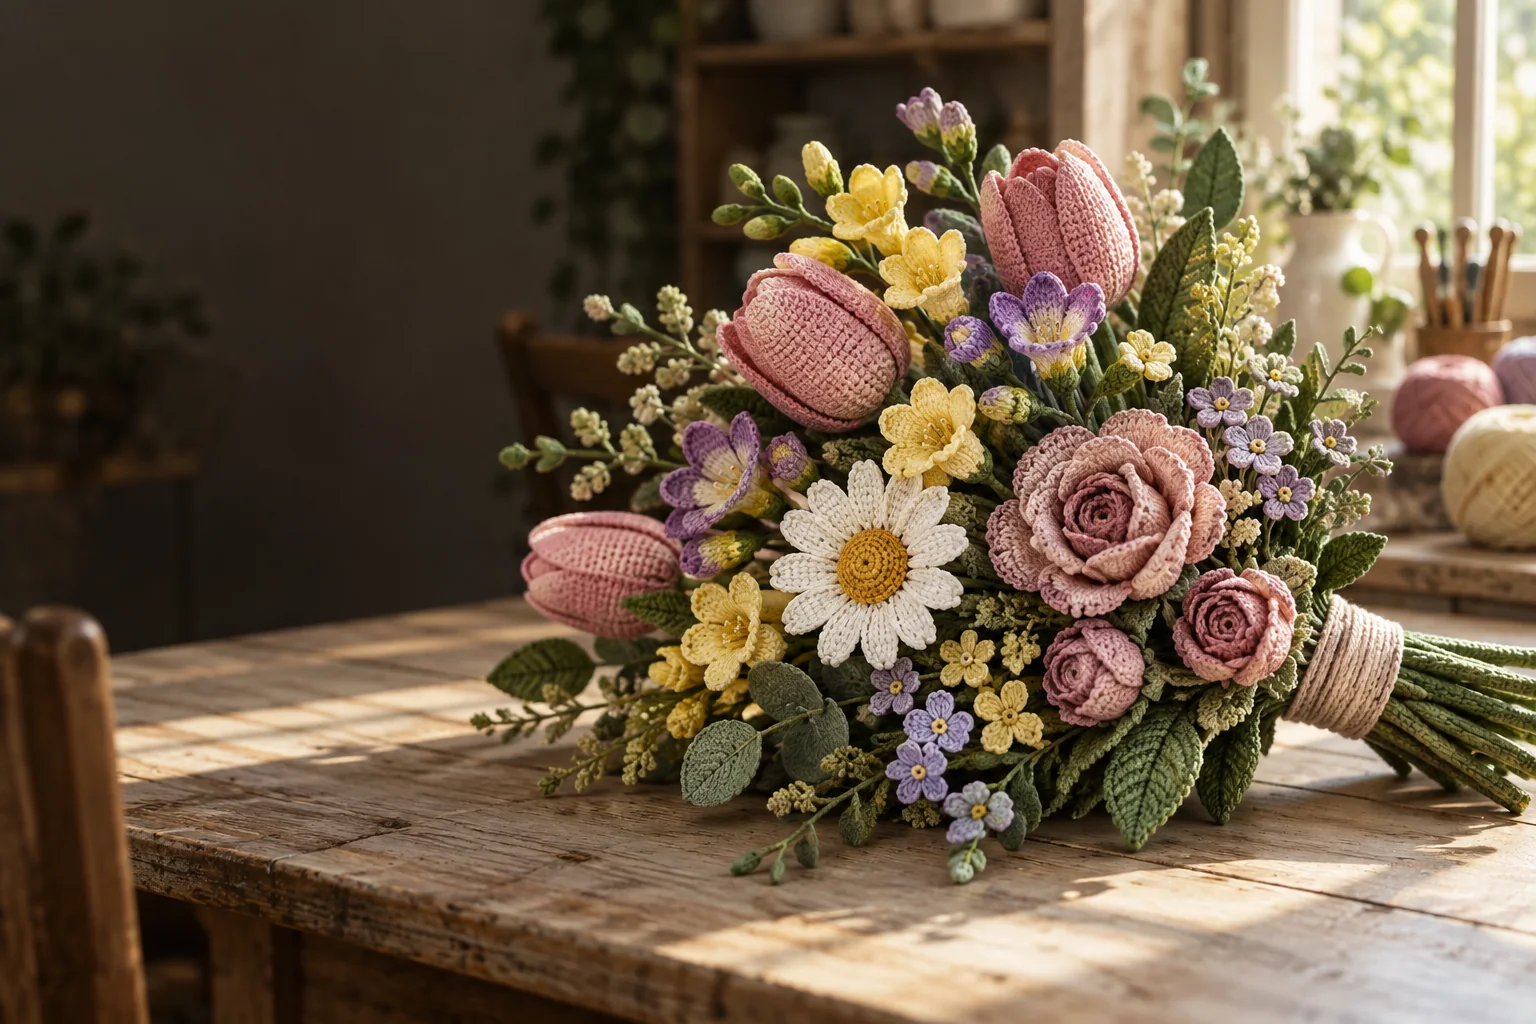
Pattern details
- Skill level
- Not stated
- Finished size
- Not stated
- Yarn
- 4-ply
- Construction
- Separate flowers and leaves with wired, yarn-wrapped stems
A mixed bouquet made from small crochet motifs
This crochet tulip bouquet guide brings together more than tulips. The kit inventory also names freesia, a daisy, a multi-head rose, forget-me-nots, and three kinds of greenery. Each bloom is made from small pieces, then supported and arranged on wrapped stems. Sorting the yarn and parts before joining anything makes the long project easier to organize.
The written directions give many stitch sequences, but they do not state the hook size, gauge, finished dimensions, or skill level. Several component counts also differ from the short kit inventory. The instructions below keep those listed quantities as written and flag places where the pages do not say whether a count applies to one flower or the whole bouquet. Do not multiply an unclear count by eight without checking the diagrams supplied with your kit.
A US or UK terminology system is not specified. This guide expands the abbreviations but does not silently convert stitch names to another regional system. Compare the names with your own crochet reference before substituting an equivalent.
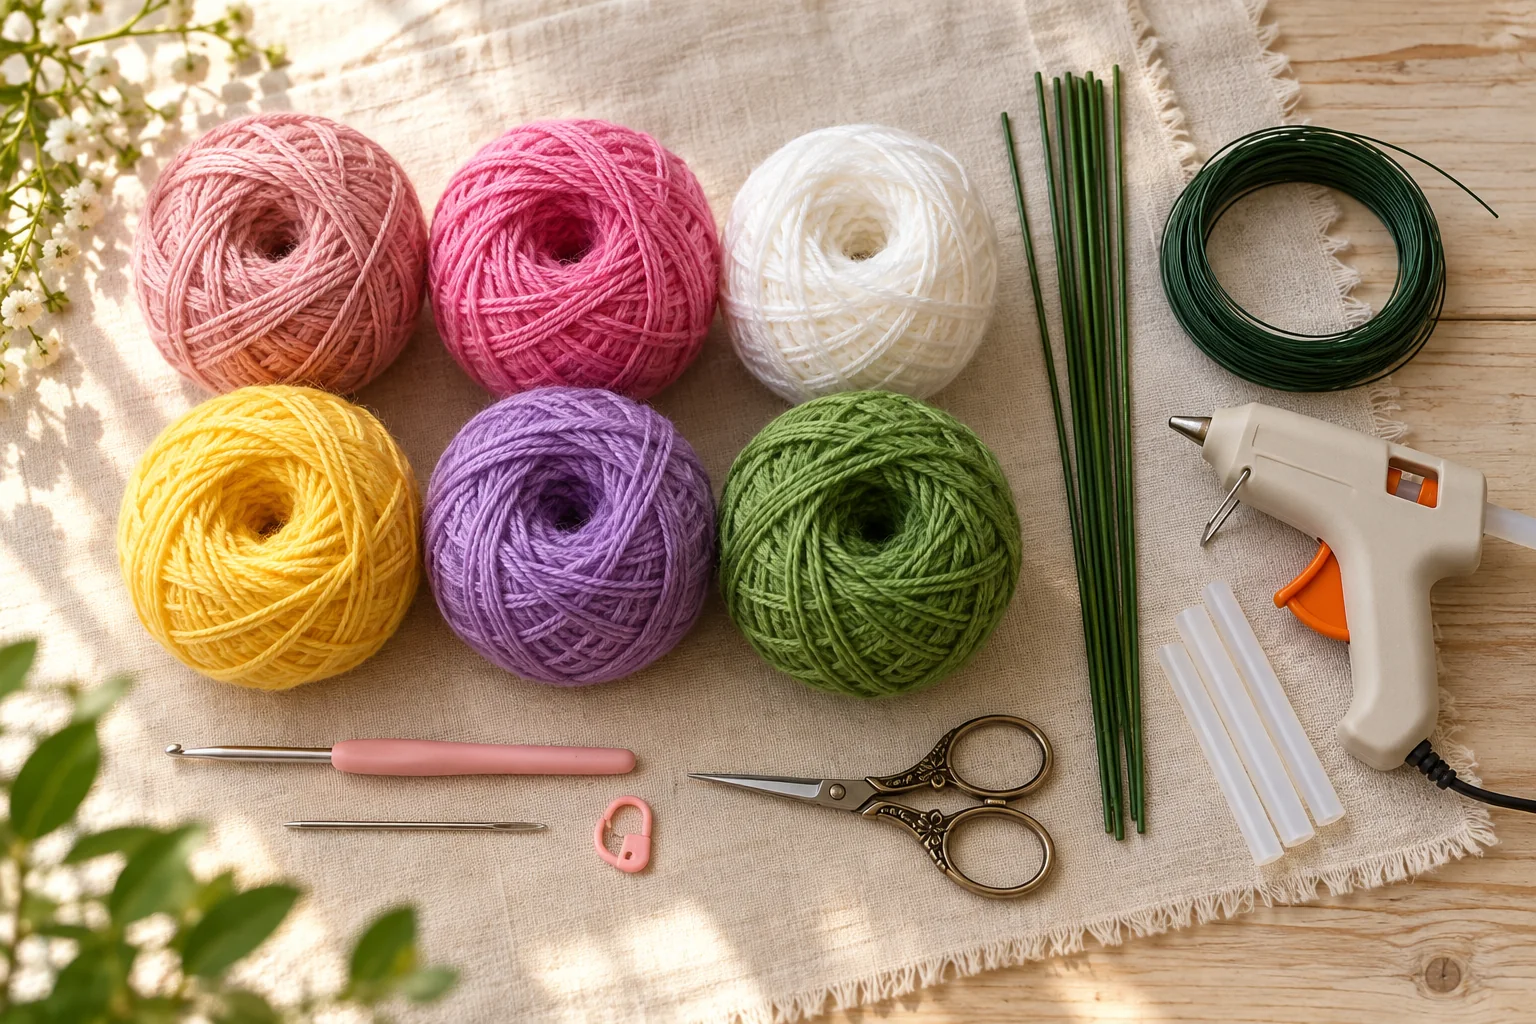
Materials and color notes
| Item | Details provided |
|---|---|
| Yarn | 4-ply. Brand, fiber content, and yardage are not stated. |
| Crochet hook | A hook is listed, but no size is given. |
| Stem supports | Flower rods and iron wire. |
| Finishing tools | Darning needle, stitch marker, and hot-melt adhesive. |
| Optional filling | A daisy note mentions filling cotton, but cotton is not in the kit materials list. |
The tulip page lists color codes #02 white ×1, #06 yellow ×1, #10 yellow ×1, #68 pink ×2, and #59 pink ×3. The freesia page lists #11 yellow ×1 and #67 purple ×1. The daisy page names #01 white and #11 yellow with “×1,” but the quantity formatting is unclear. The rose uses #61 pink ×1. Forget-me-not colors are listed as #06 yellow and #11 yellow ×1, plus #62 purple and #65 purple ×1. The greenery pages use #28 green ×1. These are the printed color codes; no yarn brand is identified.
Lay out the shades and label them before starting. Several pinks, yellows, and purples appear in the list, so a small tag beside each ball helps keep the right colors with each flower. The pattern does not give a hook size, gauge, or yarn quantities, so keep those details open rather than estimating them from a photograph.
Size, gauge, and abbreviations
No gauge, finished flower size, bouquet height, stem length, or project time is provided. The hook size and exact yarn quantities are also absent. Finished dimensions will depend on the materials and tension used; this guide does not add a target measurement.
| Short form | Meaning | Note |
|---|---|---|
| ch | chain | Chain stitch or chain space. |
| sc | single crochet | As written in the pattern. |
| hdc | half double crochet | As written in the pattern. |
| dc | double crochet | As written in the pattern. |
| tr | treble crochet | As written in the pattern. |
| ss | slip stitch | Used to join or finish. |
| st | stitch | For example, “next st.” |
| MR | magic ring | “Magic ring” is used. |
| sc2tog | single crochet two together | Used to close a daisy bud. |
Some pages say “picot” without a chain length; the four-seasons leaf specifically says “1 ch picot.” Use that stated chain only where it appears. Do not assume every picot in the bouquet uses the same number of chains.
Step-by-step crochet flower instructions
Sort the bouquet pieces
The kit inventory lists 8 tulips, 2 freesia, 1 small daisy, 1 multi-head rose, 2 forget-me-nots, 1 cymbidium leaf, 1 four-seasons leaf, and 1 eucalyptus leaf. Detailed pages list more components: five rose flower pieces, seven forget-me-not blooms, four cymbidium leaves, and seven four-seasons leaves. Those may be pieces for finished branches, but the inventory and detailed pattern counts do not match for every component. Keep a checklist and compare the component totals with your kit diagrams before repeating parts.
Start with one component set when a page does not say whether its number is for one stem or the whole kit. This is especially useful for tulip petals, freesia flower sizes, daisy heads, and greenery. The printed count is preserved below; no missing per-stem total is guessed.
Crochet the tulips and freesia
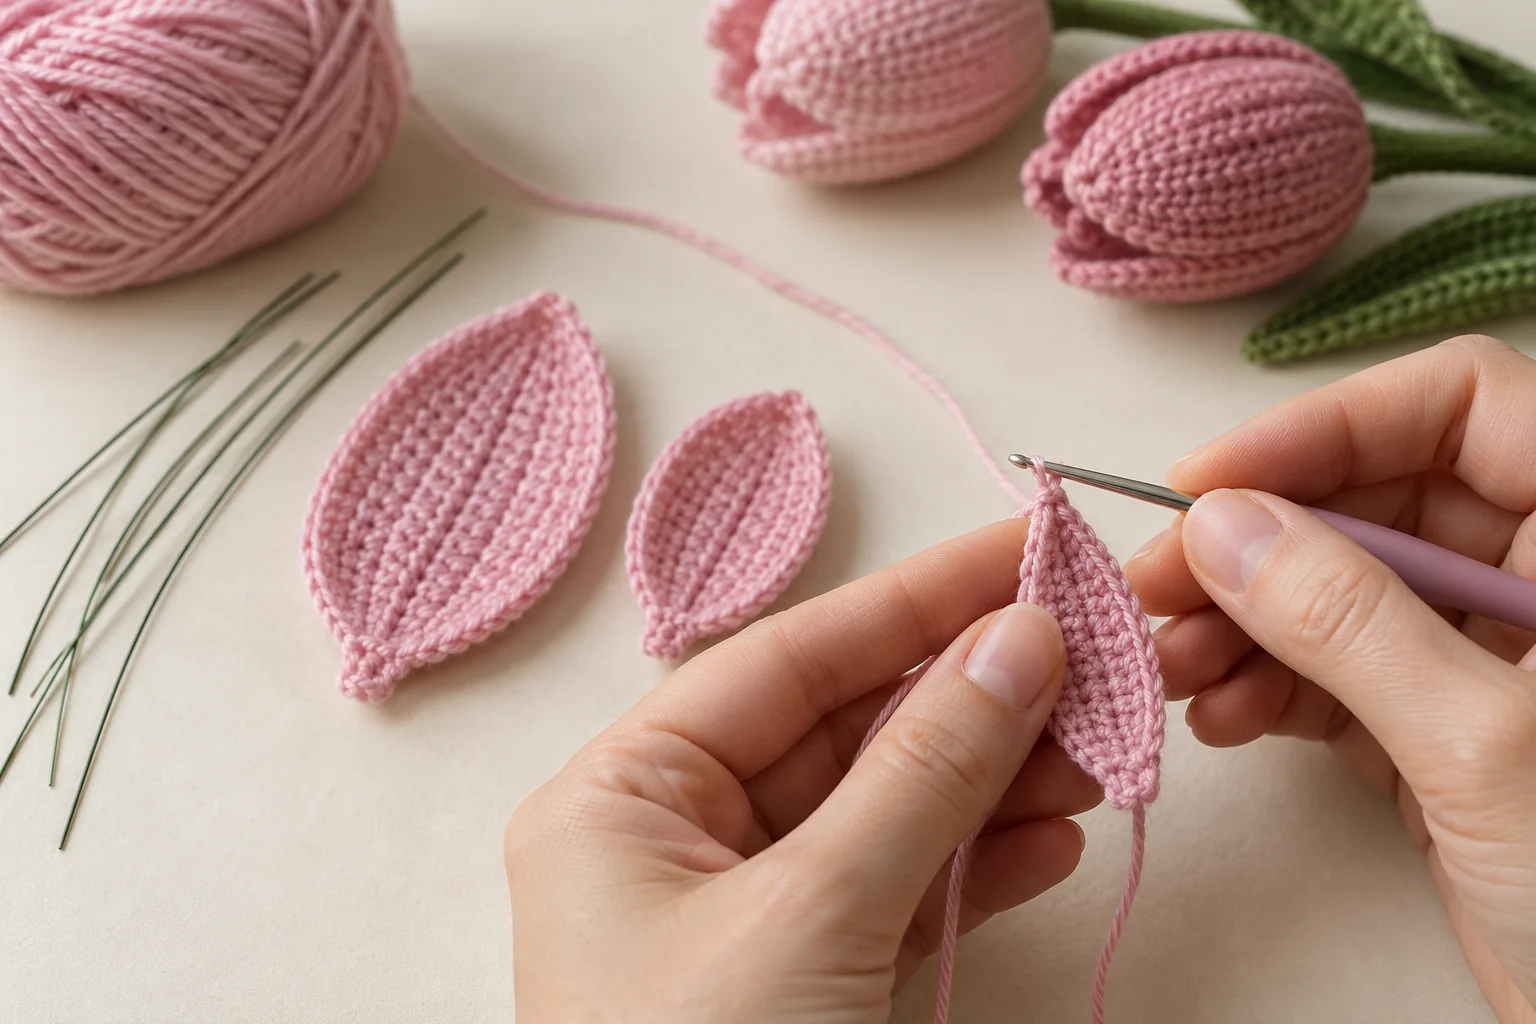
Tulip petals: The pattern lists 3 small and 3 large petals. For a small petal, ch 13. R1, starting in the second chain: 1 sc, 1 hdc, 7 dc, 1 hdc, 1 sc; 3 sc in the last st; work the other side with 1 sc, 1 hdc, 7 dc, 1 hdc, 1 sc, 1 ss, and 1 ch. R2: add iron wire, work 12 sc, 3 sc in the last st, then 11 sc on the other side and 2 sc in the next st. Cut yarn and leave a sewing tail.
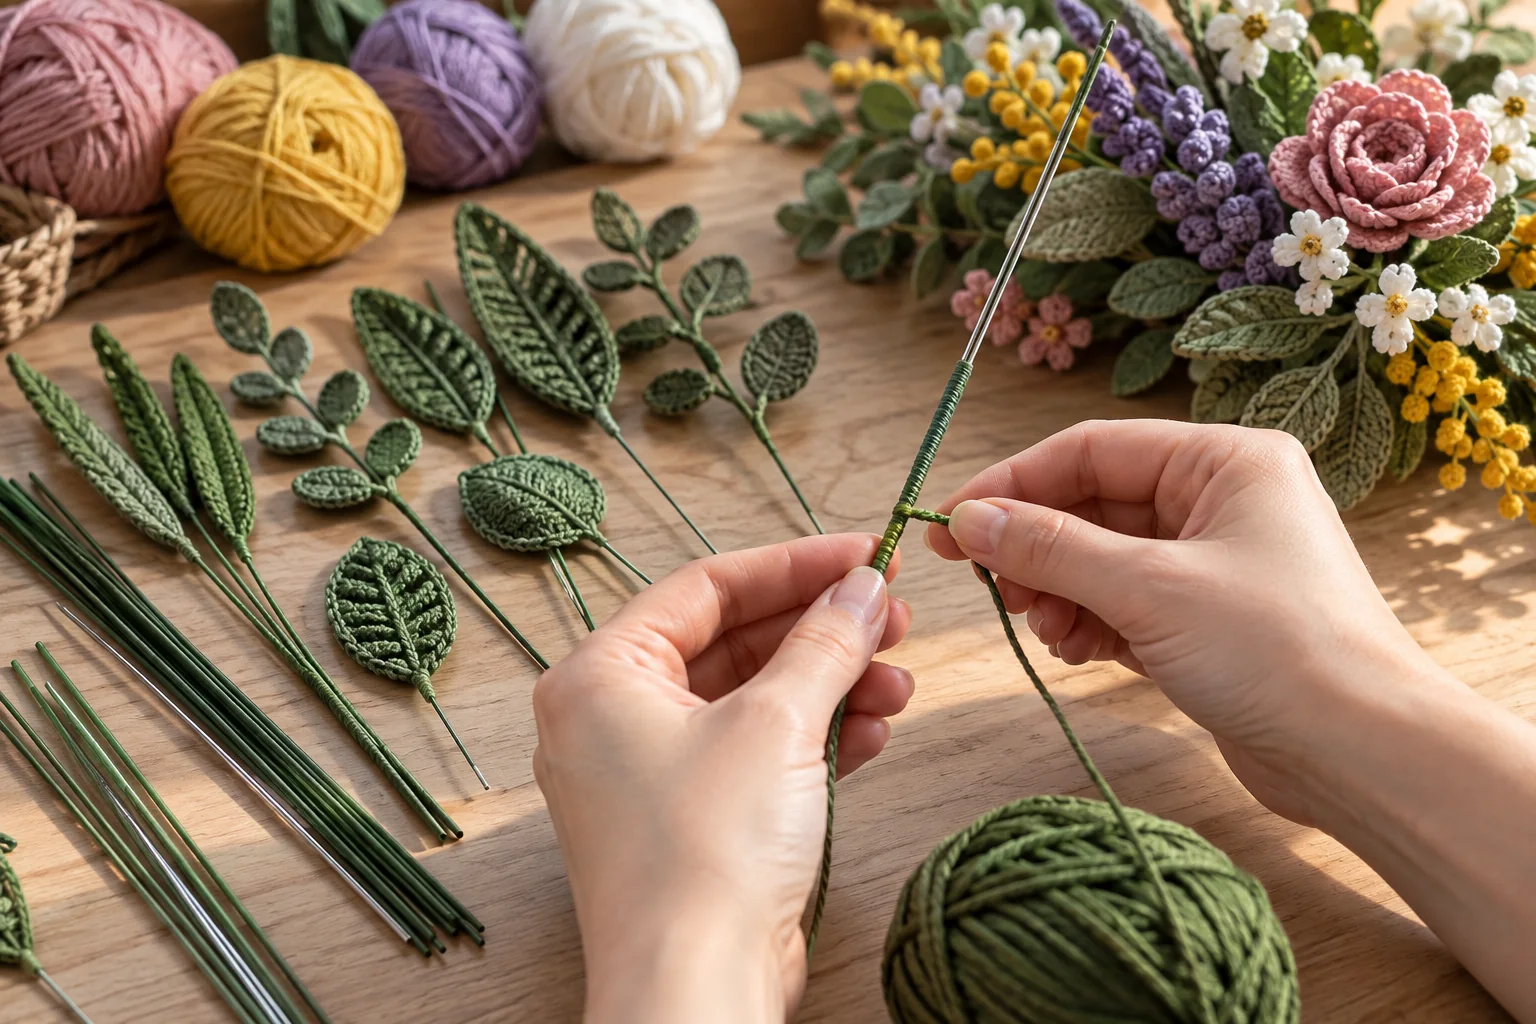
For a large petal, ch 13. R1: from the second chain work 11 sc, 3 sc in the last st, then 10 sc on the other side, 2 sc in the next st, 1 ss, and 1 ch. R2: 2 sc in the next st, 1 hdc, 8 dc, 1 hdc, 1 sc, and 3 sc in the last st; on the other side work 1 sc, 1 hdc, 8 dc, 1 hdc, 2 sc, 1 ss, and 1 ch. R3: add wire, work 14 sc, 3 sc in the last st, 13 sc, 2 sc in the next st, and 1 ss. Cut yarn and leave a tail. Make 6 stamens by wrapping yarn around the center of iron wire, folding it, then twisting. Position the stamens and petals together, sew the petal bases, and attach the flower to a rod by wrapping with doubled yarn. Continue wrapping and place leaves along the stem. For the tulip leaf, ch 30 and add iron wire. Starting in the second chain, work 2 sc, 3 hdc, 18 dc, 3 hdc, 2 sc, then 3 sc in the last st. On the other side work 2 sc, 3 hdc, 18 dc, 3 hdc, 2 sc, and 1 ss. The pattern does not state how many leaves are used on each of the 8 listed tulips.
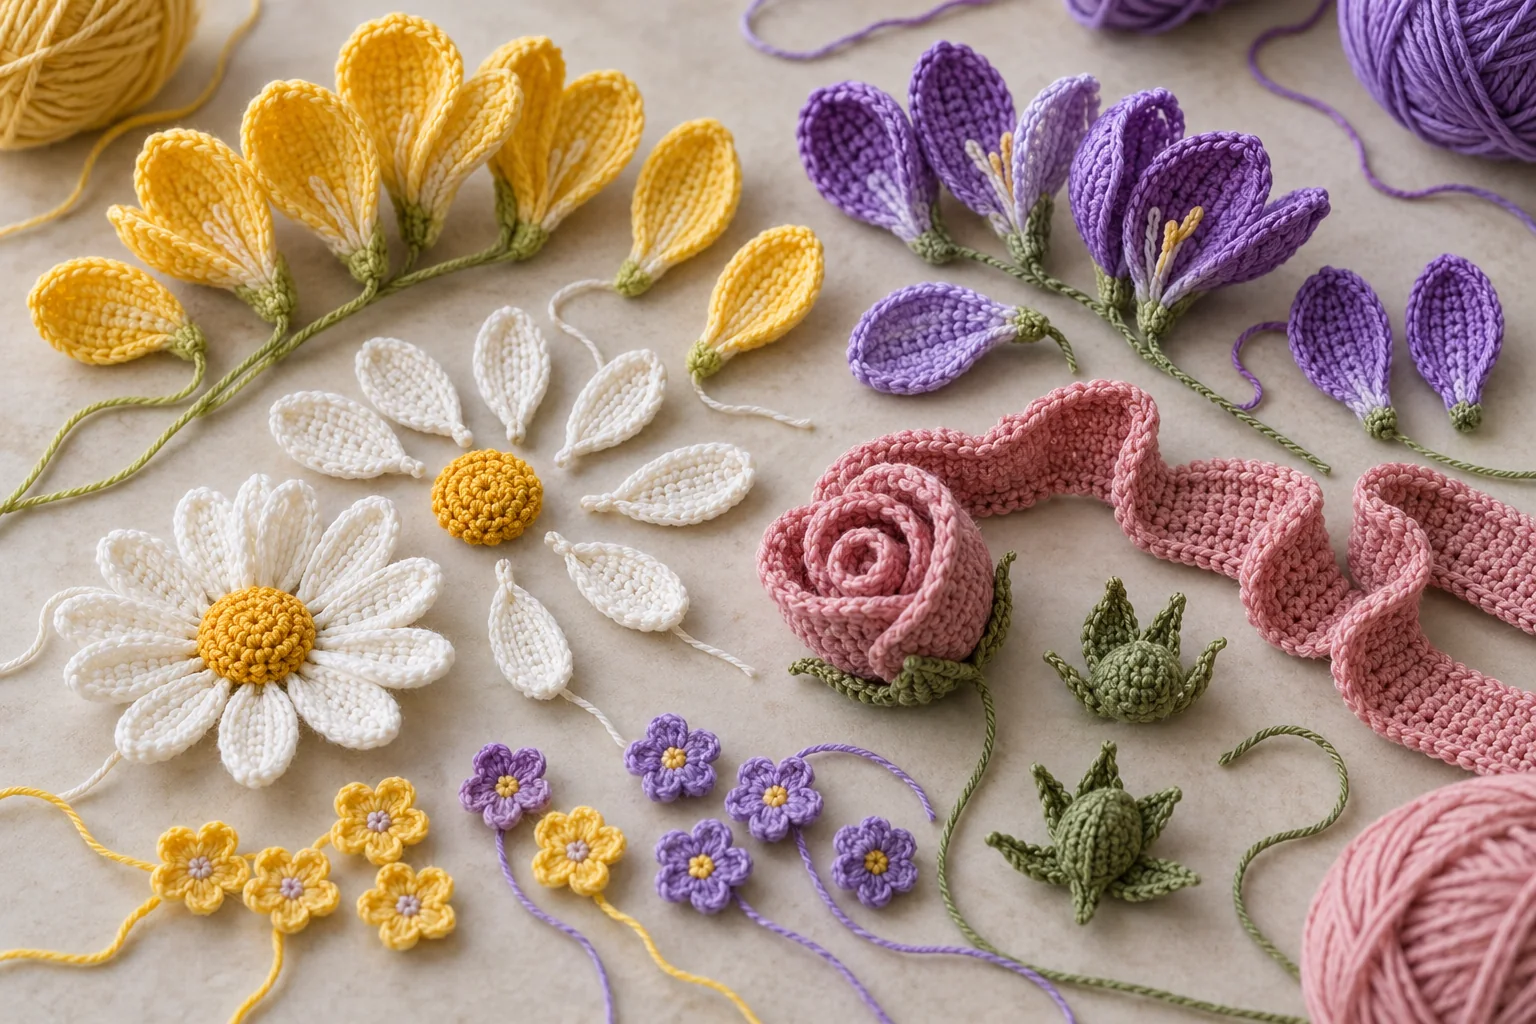
Freesia flower pieces: The pattern lists 3 big, 3 middle, and 3 small pieces. Each begins with ch 4, then 3 dc in the first chain; turn. R2: ch 3, then (3 dc in the same st) 3 times; turn. R3: ch 3, then (2 dc in the same st) 9 times; turn.
- Big-petal finish: In the same st make ch 4 and 1 tr; in the same st make 2 tr in the next st and 1 picot; 1 tr in the next st; in the same st make 1 tr, ch 4, and 1 ss. For the middle petals, repeat twice: in the same st make 1 ss, ch 4, 1 tr; in the same st make 2 tr in the next st, 1 picot, 1 tr; in the same st make 1 tr, ch 4, 1 ss. Work 2 ss. For small petals, repeat three times: in the same st make 1 ss, ch 4, 2 tr in the next st, 1 picot; then in the same st make 1 tr, ch 4, 1 ss. Finish with ch 1, cut, and weave ends.
- Middle-petal finish: For the big petal, in the same st make ch 2 and 1 dc; in the same st make 2 dc in the next st and 1 picot; 1 dc in the next st; in the same st make 1 dc, ch 2, 1 ss. Repeat the middle-petal group twice: in the same st make 1 ss, ch 2, 1 dc; in the same st make 2 dc in the next st, 1 picot, 1 dc; in the same st make 1 dc, ch 2, 1 ss. Work 2 ss. Repeat the small-petal group 3 times: in the same st make 1 ss, ch 2, 2 dc in the next st, 1 picot; then in the same st make 1 dc, ch 2, 1 ss. Finish with ch 1, cut, and weave ends.
- Small freesia: Use the first two rows above. R3 is: in the same st make ch 2 and 1 dc; then 1 dc and 1 picot; in the same st make 1 dc, ch 2, 1 ss. Repeat this group twice, then ch 1, cut, and weave ends.
For each sepal, start with an MR. R1: (ch 2, 2 dc, ch 3, 1 ss in the ring) twice; ch 1, cut, and close the ring. The pattern also says to make 2 buds: fold a wire piece, tie pink yarn at its middle, wrap it into a bud, and wrap green yarn from the center down the stem. Secure the tail with hot-melt adhesive. To assemble freesia, put wire in the flower center, arrange the crocheted pieces around it, attach the sepal underneath, then wrap the stem in matching yarn. The page does not say how the nine listed flower pieces are split across the 2 kit freesia. The freesia leaf begins with ch 30. Add wire; from the second chain work 4 sc, 21 hdc, 3 sc, then 3 sc in the same st. On the other side work 3 sc, 21 hdc, 4 sc, then 1 ss in the first st. Cut yarn and leave a tail.
Make the daisy, rose, and forget-me-nots
Daisy: The detailed page says to make 3 flowers. For a green stamen, start with an MR and ch 1. R1: 6 sc in ring, 1 ss (6). R2: ch 1, (2 sc in next st) 6 times, 1 ss (12). R3: 12 sc, 1 ss (12). Fold iron wire in half, tie scrap yarn over it, and insert it through the green stamen with the fold and scrap yarn inside. Pull the tail through the center and place the yellow stamen over the green one. Join both pieces with cream yarn. For petals, repeat (ch 4, 1 tr, ch 4, 1 ss in next st) 12 times for 12 petals; cut and weave ends.
The daisy note says the stem may be attached around the tenth petal, or some filling cotton may be added before petals are joined. The wording “tenth flower petals” is unclear. For each of the 2 buds, use white yarn: MR, ch 3, 9 dc, close, ss, and cut leaving two tails. Join green yarn, ch 2, hdc 9, ss. R3: ch 1, (1 sc, sc2tog) 3 times. Cut with a tail, add wire, tuck in the tails, close through back loops, and weave in.
Make 2 daisy leaves. With green, ch 13 and add wire. From the second chain work 11 sc, 3 sc in the last st, 11 sc on the other side, and 1 ss. R2: ch 1, repeat (sc2tog, ch 2, 1 ss into the base of the same st, 1 ss in the next st, ch 1) 12 times; finish with 1 ss. For assembly, place both buds and the first flower on the rod, wrap about 1 inch, then add the second and third flowers opposite one another. Wrap down, add leaves, and secure with hot-melt adhesive. The kit list says 1 small daisy, while the detailed page says 3 flower heads and 2 buds.
Multi-head rose: The pattern lists 5 rose flower pieces. For each, ch 26. R2: from the fourth st from the hook, repeat (3 dc in the same st, 1 sc, skip 1 st) 7 times. Turn. R3: repeat (ch 2, 1 dc, 2 dc in the next st, 1 dc, ch 2, 1 ss in the next st) 7 times; ch 1. Make 5 sepals: MR, 5 sc, close, 1 ss in first st, ch 1. R2: (2 sc in next st) 5 times, 1 ss, ch 1. R3: 10 sc, 1 ss, ch 1. R4: repeat (ch 5; from second ch make 2 ss, 1 sc, 1 hdc; skip 1 st, 1 ss in next st) 5 times; ch 1. Make 3 leaves: ch 10, add wire, then from second chain work 1 sc, 1 hdc, 5 dc, 1 hdc, 3 sc in the same st; on the other side work 1 hdc, 5 dc, 1 hdc, 1 sc, and 1 ss. No written assembly order is given for the rose.
Forget-me-nots: The directions say to make 7 flowers and 7 stamens. Start each flower with an MR, 5 sc, 1 ss, and close. For five-petal edging, in one st make ch 3, 2 dc, ch 3, then 1 ss in the next st. After the first set, repeat four times; ch 1, cut, and weave ends. For each stamen, use 6 inches (15 cm) of wire. Starting about 2 inches (5 cm) from an end, wrap yellow yarn for 1 inch (2.5 cm), fold the wire with yellow ends aligned, then wrap both wires together in green for 1 inch (2.5 cm); cut and knot.
Make 3 leaves with green yarn and ch 16. Add wire. From the second chain work 1 sc, 1 hdc, 9 dc, 2 hdc, 1 sc, 3 sc in the same st; on the other side work 1 sc, 2 hdc, 9 dc, 1 hdc, 1 sc, and 1 ss. Cut and wrap the tail around the wire. Two assembly choices are described: pass each stamen wire through a flower center, cover it with green yarn, then group the three leaves and wrap the stem; or place one flower at the tip and add the remaining blooms about half an inch apart in a staggered line, then add leaves and wrap down. The kit list says 2 forget-me-nots, while the flower page lists 7 tiny blooms and does not explain how they split between two stems.
Make the wired leaves
Cymbidium leaves: Make 4. Ch 60, add wire, and from the second chain work 3 sc, 52 hdc, 3 sc; 3 sc in the same st; on the other side work 3 sc, 52 hdc, 3 sc, then 1 ss in the first st. Cut and wrap the tail around the wire. Assembly says to wrap two leaves together near the top of a flower stem, add the other two, continue wrapping, and secure with hot-melt adhesive. The kit list names one cymbidium leaf, so it is unclear whether that means a branch built from four pieces.
Four-seasons leaves: Make 7. Ch 12 and add wire. From the second chain, R1 is 1 sc, 1 hdc, 1 dc, 5 tr, 1 dc, 1 hdc, 3 sc in the same st; then 1 hdc, 1 dc, 5 tr, 1 dc, 1 hdc, 1 sc on the other side; 1 ss in first st and ch 1. R2: 11 sc, then in the same st (1 sc, 1 ch picot, 1 sc), then 11 sc and 1 ss. Cut and wrap the tail around the wire. Place one leaf at the top of a stem, add two more symmetrically, wrap down, and secure. The short inventory says one four-seasons leaf while the detailed page says make seven.
Eucalyptus leaves: The page gives four small piece types. Make 2 Leaf A: MR, 3 sc, ch 2, 3 sc in the ring, 1 ss, ch 1. Make 3 Leaf B: MR, 7 sc, 1 ss, ch 1; R2 add wire and (2 sc in next st) 7 times, then 1 ss. Make 3 Leaf C: MR, 7 sc, 1 ss, ch 1; R2 add wire, (1 sc and 1 hdc in the same st), (2 hdc in next st) twice, 3 hdc in the same st, (2 hdc in next st) twice, (1 hdc and 1 sc in the same st), 1 ss. Make 2 Leaf D: MR, 8 sc, 1 ss, ch 1; R2 add wire, (1 sc and 1 hdc in the same st), (3 dc in the same st) 3 times, ch 2, (3 dc in the same st) 3 times, (1 hdc and 1 sc in the same st), 1 ss.
To assemble eucalyptus, glue one A piece at the top of the stem, wrap yarn, add the second A, then add B, C, and D with staggered spacing. Keep wrapping and secure the end. The short kit inventory does not say how many branches these ten pieces form.
Wrap the stems and arrange the bouquet
For flowers with a written assembly sequence, place the wire or flower rod in the center, position the crocheted pieces, and wrap with matching yarn as directed. Add leaves while wrapping where the pattern calls for them. Keep each finished group on a checklist so the flower counts do not get mixed up. Follow the specific assembly paragraph for each flower type; the rose section does not include one.
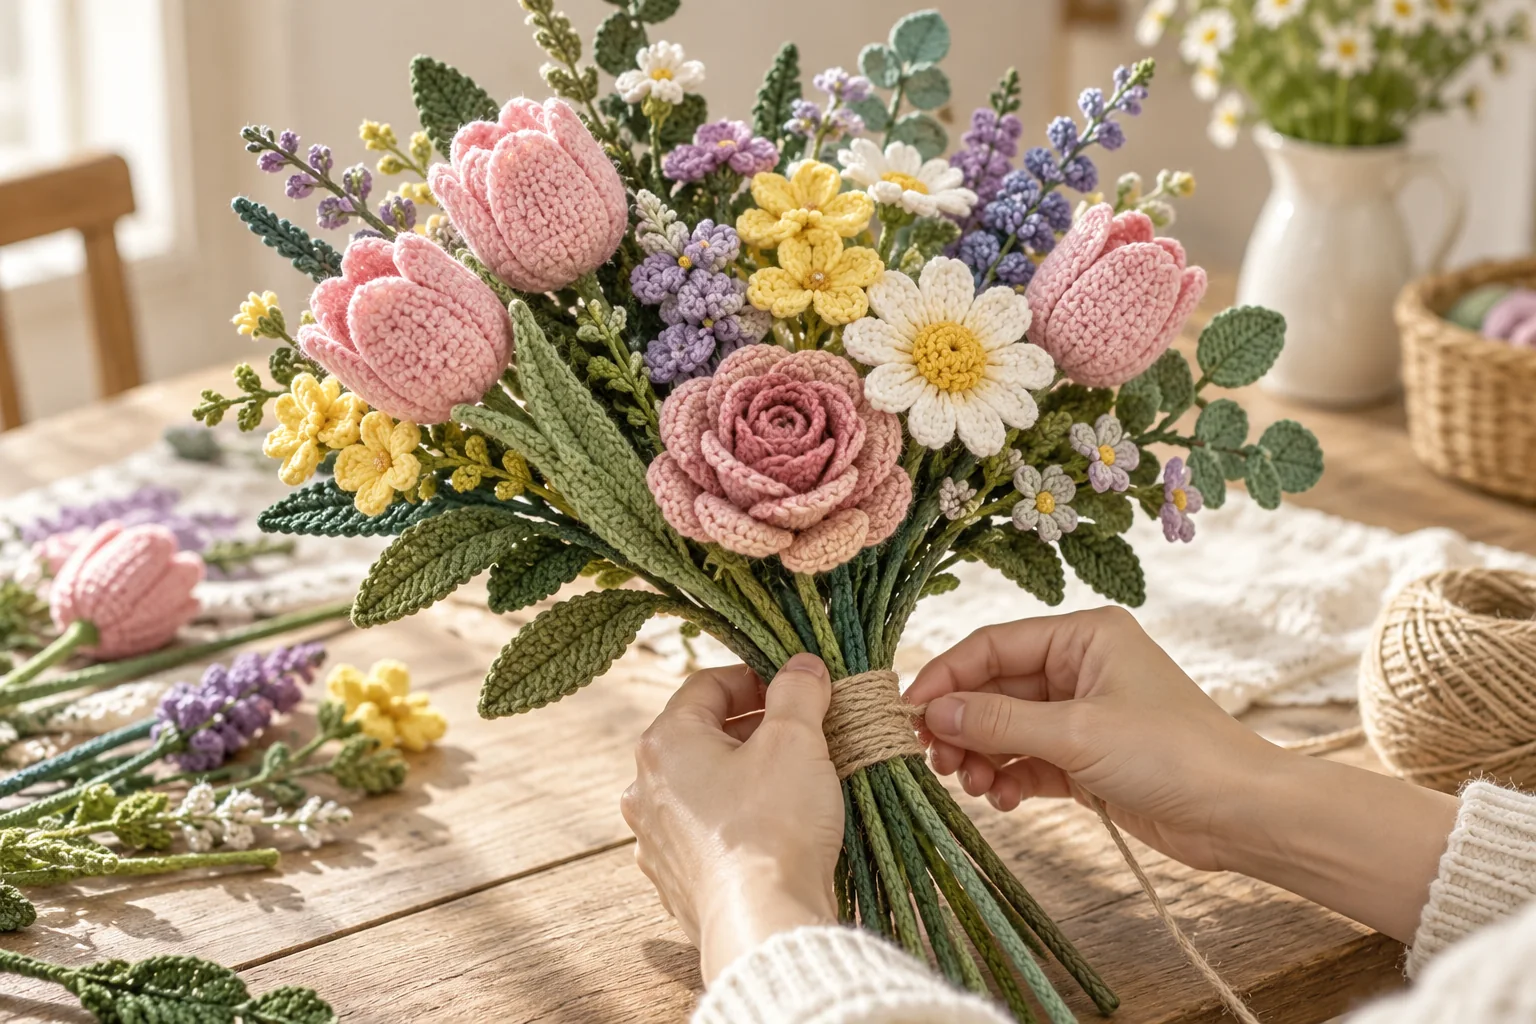
The pattern does not give a complete layout for combining every stem. As an optional display idea, arrange the taller tulips slightly behind the smaller clusters, rotate the bouquet as you add stems, and place greenery around the outside. This is a styling suggestion, not a measured construction step from the pattern instructions.
When the arrangement looks balanced, gather the wrapped stems using the finishing materials supplied with your kit. No binding length, vase size, or final stem measurement is stated. Keep the structural wire intact until the placement is settled, trim only loose yarn ends, and check that every flower and leaf is firmly attached before displaying the bouquet.
Helpful checks before you finish
- Color mix-ups: Keep a tag beside each yarn shade and compare it with the printed code before changing colors.
- Unclear piece counts: The inventory and detailed instructions use different totals for the daisy, rose, forget-me-nots, and leaves. Do not assume every component count is a per-stem amount.
- Petals sitting unevenly: Arrange the petal bases around the stamen before sewing them. The instructions do not give finished dimensions or a blocking method.
- Wire showing: Continue the yarn wrap over the wire as the assembly directions describe. Keep cut ends tucked inside the wrapped stem.
- Picot size: Only the four-seasons leaf specifies a one-chain picot. Other pages simply say “picot.”
- Unclear stitch path: The tulip pages do not state final stitch totals. Compare the chain-side path with the kit diagram rather than adding or removing stitches by guesswork.
These checks help organize the written directions, but they do not replace a clear view of each motif. Video material is mentioned for some flowers. Use any tutorial supplied with your own kit if a wire placement or joining point remains unclear.
Optional bouquet variations
Arrange the listed colors in different ways without changing the stitch directions. Group the pink tulips together for a softer display, or alternate pink, yellow, and purple heads for a brighter bouquet. The daisy and forget-me-not clusters can sit near the outside so their smaller shapes remain visible. These are display choices only; they do not change the pattern counts.
If substituting yarn, remember that only “4-ply” is specified. It gives no gauge, yardage, or hook size. A different yarn can change the finished size, so check the fit of each wire-supported piece as you assemble it.
Frequently asked questions
How many flowers are listed for the bouquet?
The kit inventory names 8 tulips, 2 freesia, 1 small daisy, 1 multi-head rose, and 2 forget-me-nots, plus three kinds of greenery. Detailed pages list additional component pieces, so check the count notes above before making multiples.
What hook size and gauge should I use?
Neither is specified. Check the hook in your kit or packaging; the guide does not add an invented size or gauge.
What size is the finished bouquet?
No flower dimensions, bouquet height, width, or stem length are given. Final size depends on your materials and arrangement.
Is this a beginner crochet pattern?
No skill level is specified. It includes small motifs, wire, joining, wrapping, and hot-melt adhesive, so review the abbreviations and assembly notes before starting.
Does the pattern specify how to arrange the complete bouquet?
It gives assembly directions for several flower types and leaves, but not one final layout for all stems. The arrangement idea in this guide is optional styling advice.
A colorful handmade display
This crochet tulip bouquet brings together wired petals, small flower motifs, wrapped stems, and layered greenery. Sort the color codes, check the component counts against the diagrams in your kit, and finish one flower group at a time. Because hook size, gauge, finished measurements, and several per-flower counts are not stated, keep those details open rather than guessing. For more ideas, browse the crochet flower bouquets and free crochet flower patterns collections.