Pattern details
- Skill level
- Described as beginner-friendly in the source
- Finished size
- Not specified
- Hook
- 2.0 mm
- Terminology
- US crochet terms
- Construction
- Separate crocheted head, body and details, joined during assembly
- Eye size
- 6.0 mm safety eyes
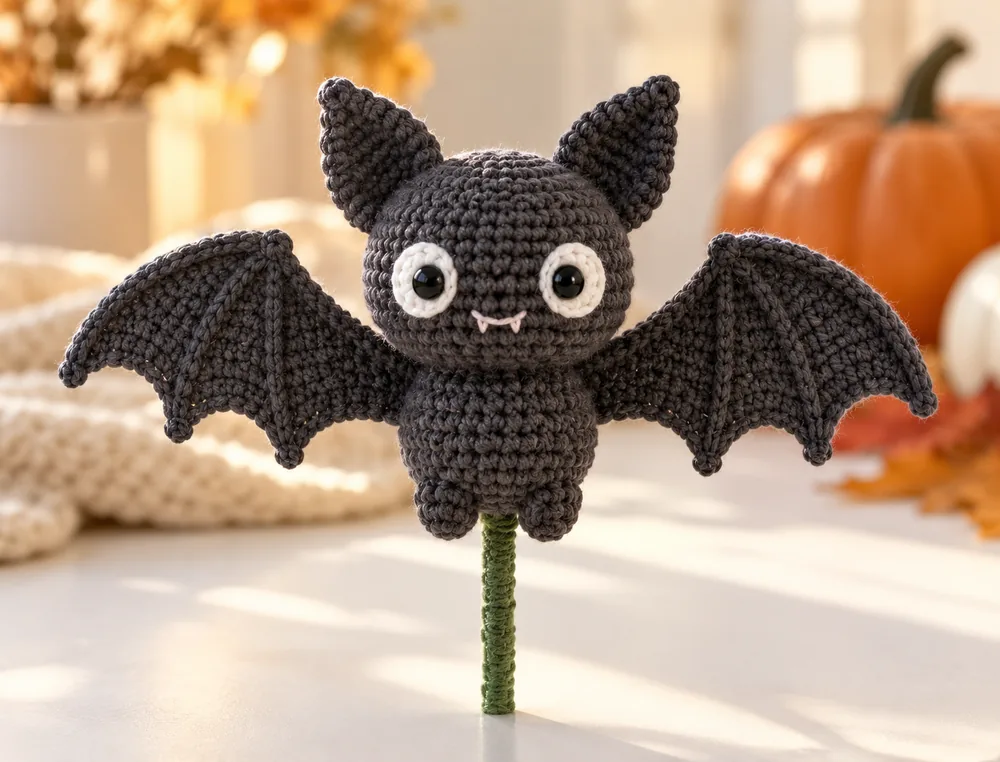
A small bat with picot-edged wings
This amigurumi-style bat is built from a rounded head, a compact body joined to two legs, two pointed ears, two wings, and small white crocheted eye circles. The source lists gray and white yarn and describes the tutorial as beginner-friendly.
The pattern uses US crochet terms and a 2.0 mm hook. It does not list yarn weight, yardage, gauge, finished size, or project time. The exact number of ears, wings, and white eye circles is not stated; the assembly refers to pairs, so making two of each is an interpretation of that assembly.
This guide keeps the printed counts and order. It flags places where the joining path or finishing method is not fully explained, so you can pause instead of guessing at a change.
Materials and tools
Yarn
Gray and white yarn are listed. Weight, fiber, brand, and quantity are not specified.
2.0 mm crochet hook
Use the listed hook size. No alternate size or gauge is provided.
Finishing tools
Scissors, a stitch marker, and a darning needle for joining and weaving in ends.
Eyes and stuffing
The materials list includes 6.0 mm safety eyes and cotton stuffing. White yarn makes the crocheted eye pieces.
Stem
A flower rod is listed and inserted into the middle of the body. Its fastening and covering are not explained.
Hot-melt glue
The assembly directions use hot-melt adhesive to attach wings, ears, and eyes.
Mark the beginning of each round. A reliable yarn estimate cannot be calculated from hook size alone.

Sizing and gauge
The pattern does not give finished dimensions, stitch gauge, or yarn amount. A 2.0 mm hook alone is not enough to predict the bat’s size; yarn, tension, and assembly all affect the result.
Follow the round counts and check each bracketed total before continuing. The source does not provide a tested adjustment method for a target size.
US stitches and abbreviations
The pattern states that it uses US crochet terms. “ss” means slip stitch; “sc2tog” means single crochet two stitches together.
- ch — chain
- st — stitch
- sc — single crochet
- ss — slip stitch
- sc2tog — single crochet two stitches together
- inc — 2 sc in the next stitch
- MR — magic ring
- picot — the source calls for a 1-chain picot but does not define its anchoring point
For the head and eye circles, the printed bracketed totals are the check counts. The source does not explain whether the joining chain counts; do not add it as an extra stitch when checking those totals.
Step-by-step crochet Halloween bat pattern
Make the head and body pieces, then crochet the ears, wings, and white eye circles. The source joins several rounds with a slip stitch and chain; where it omits a joining instruction, this guide does not add one.
-
Crochet the head
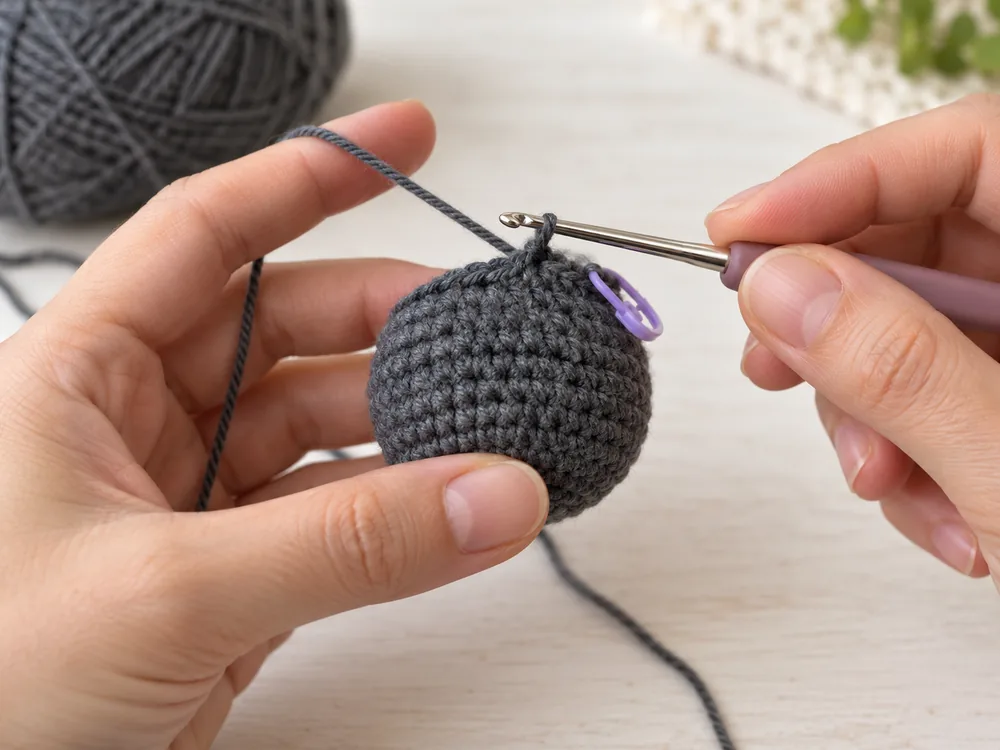
With gray yarn, begin with a magic ring. The source lists a slip stitch and chain after R1 through R21. Keep the stated stitch count for each round.
- R1: 6 sc in the ring; 1 ss and 1 ch. [6]
- R2: 2 sc in the next st 6 times; 1 ss and 1 ch. [12]
- R3: (1 sc, 2 sc in the next st) 6 times; 1 ss and 1 ch. [18]
- R4: (1 sc, 2 sc in the next st, 1 sc) 6 times; 1 ss and 1 ch. [24]
- R5: 24 sc; 1 ss and 1 ch. [24]
- R6: (3 sc, 2 sc in the next st) 6 times; 1 ss and 1 ch. [30]
- R7: 30 sc; 1 ss and 1 ch. [30]
- R8: (2 sc, 2 sc in the next st, 2 sc) 6 times; 1 ss and 1 ch. [36]
- R9: (5 sc, 2 sc in the next st) 6 times; 1 ss and 1 ch. [42]
- R10–R18: 42 sc in each round; 1 ss and 1 ch after each. [42]
- R19: (2 sc, sc2tog, 2 sc) 7 times; 1 ss and 1 ch. [35]
- R20: (3 sc, sc2tog) 7 times; 1 ss and 1 ch. [28]
- R21: sc2tog 14 times; 1 ss and 1 ch. [14]
- R22: sc2tog 7 times, then 1 ss in the first st. [7] Cut the yarn and weave in the end.
Count check: R19 uses 35 stitches to make 28; R20 makes 28; R21 makes 14; R22 closes to 7.
-
Make the joined body and legs
Make two legs in gray yarn. For each, begin with a magic ring and work 5 sc in R1 and 5 sc in R2. The source does not state whether to join these first rounds.
After the first leg, cut the yarn. Work the second leg and keep its yarn attached. Chain 5 to connect it to the first leg. For R3, the source lists 5 sc, then 5 sc into the 5-chain space, another 5 sc, and 5 sc into that same chain space; join with 1 ss and make 1 ch. [20]
R4–R11: 20 sc in each round. After R11, cut the yarn and leave a long tail. The source says to bend one end of the flower stem and insert it into the middle of the body.
The source does not identify the first stitch for R3 or the direction around the chain bridge. Its four groups of 5 sc total 20; follow that count without changing the path by guesswork.

Before closing the body, add the listed cotton stuffing. The PDF does not say to stuff the head, so that step is not added here.

-
Crochet the ears
The assembly says to attach both ears, while the crochet instructions do not give a quantity. The paired assembly implies two matching ears; repeat these rounds for the second.
- R1: In a magic ring, work 6 sc; 1 ss and 1 ch. [6]
- R2: (1 sc, 2 sc in the next st) 3 times; 1 ss and 1 ch. [9]
- R3: (1 sc, 2 sc in the next st, 1 sc) 3 times; 1 ss and 1 ch. [12]
- R4–R6: 12 sc in each round; 1 ss and 1 ch after each. [12]
- R7: (1 sc, sc2tog, 1 sc) 3 times. [9] Cut the yarn and leave a tail.

-
Make the picot-edged wings
Begin each gray wing with a magic ring. The source refers to wings in the assembly but does not explicitly state how many; two matching pieces are implied.
- R1: 7 sc in the ring; 1 ss and 1 ch. [7]
- R2: 2 sc in the next st 7 times; 1 ss and 1 ch. [14]
- R3: (1 sc, 2 sc in the next st) 7 times; 1 ss and 1 ch. [21]
- R4: (1 sc, 2 sc in the next st, 1 sc) 7 times; 1 ss and 1 ch. [28]
- R5–R7: 28 sc in each round; 1 ss and 1 ch after each. [28]
- R8: Fold the piece in half and work along the edge: (1 sc, 1 ch picot st, 3 ss) 3 times; then (1 sc, 1 ch picot st), followed by 1 ss in the next st. The source gives [14]. Cut the yarn and leave a tail.
The PDF does not show where each 1-chain picot is anchored along the folded edge. It reports 14 edge stitches but gives no diagram. Keep the written sequence and count visible rather than inserting extra stitches.

-
Make the white eye circles
The assembly refers to both eyes, so two matching circles are implied; the source does not state a quantity here.
- R1: 6 sc in the ring; 1 ss and 1 ch. [6]
- R2: 2 sc in the next st 6 times; 1 ss and 1 ch. [12]
- R3: (1 sc, 2 sc in the next st) 6 times. [18] Cut the yarn and weave in the end.
The source lists 6.0 mm safety eyes but does not explain how to secure them through the white crochet circles or specify backing placement.
Assembly and finishing
Follow the source order: sew the body to the head at the head’s R21, add cotton stuffing to the body, close it, and cut the working yarn. The method for closing the body opening is not described.
Use hot-melt adhesive to attach both wings to the body. Attach the ears on opposite sides of the head between R5 and R8. Glue both eyes in place, then embroider the mouth. Exact eye spacing and mouth placement are not given.
The flower rod is listed as a material. The body instructions say to bend one end and insert it into the middle of the body; the final assembly note says to “weave” the rod with the existing yarn. The source does not explain how those directions connect or how the rod is secured. Cover every exposed end before using the bat as a display decoration.
Safety: Safety eyes, a flower rod, scissors, and hot-melt glue can be hazardous to young children. Use the glued and stemmed version as a display decoration, and keep small parts and hot tools away from children. Embroidered eyes are a general alternative to loose plastic pieces; that change is not part of the source pattern.

Count checks and unclear steps
The head count changes unexpectedly
Check the printed totals: 6, 12, 18, 24, 24, 30, 30, 36, 42; 42 through R18; then 35, 28, 14, and 7. Do not add the joining chain as an extra stitch when checking the bracketed totals.
The body bridge is hard to follow
The source chains 5 between the legs and lists four groups of 5 sc for R3. It does not name the exact starting stitch or direction. The stated total is 20; pause if the chain path is unclear.
The folded wing edge does not finish at 14
R8 is written for a folded edge and ends with a count of 14. The 1-chain picot anchoring point is not defined, so do not invent an extra base stitch.
The rod or eyes do not feel secure
The source does not explain the flower-rod fastening or safety-eye backing placement. Check both before closing or gluing parts. Do not leave an exposed rod or rely on glue alone for a child’s toy.
Crochet Halloween bat pattern FAQs
What hook size does the bat pattern use?
The materials list specifies a 2.0 mm crochet hook.
What yarn weight and how much yarn do I need?
The source lists gray and white yarn but does not give weight, fiber, brand, or yardage.
What size will the finished bat be?
No finished measurements or gauge are provided, so the final size is not specified.
How many ears, wings, and eye circles should I make?
The assembly refers to both ears, wings, and eyes, but the individual instructions do not state quantities. Two matching pieces for each pair are implied by the assembly.
Is the pattern tested?
The supplied material does not state that it was sample-tested. The stitch totals have been checked arithmetically here, but no finished sample was available for verification.
Before you begin
- Gather gray and white yarn, the 2.0 mm hook, stitch marker, scissors, darning needle, 6.0 mm safety eyes, cotton stuffing, flower rod, and hot-melt glue.
- Use the printed round counts and mark the start of each joined round.
- Plan on two ears, two wings, and two white eye circles based on assembly wording; the pattern does not state these quantities explicitly.
- Review the body-chain path, folded wing picot placement, eye attachment, and flower-rod finish before assembly.
Work one small piece at a time and check each count before moving to the next round. The pictures are illustrative; finished size and sample results have not been measured.